The last time I brewed with my Brewie+ was July 12, 2019. The machine failed during that brew, leaving wort slowly cooling in the boil kettle. I saved the batch by pumping it to another kettle and finishing it out there, but the Brewie itself was out of commission. I contacted the manufacturer that evening for help. Two days later, I was told that parts were on the way to repair it. It's now September 7, and those parts haven't arrived.
In the meantime, there are strong indications that the company making the Brewie has gone out of business. I'm hopeful those are just rumors, but there are a number of facts that suggest otherwise. Although their web site is still active, their tech support system reports "Account suspended" if you try to post a case or ask a question. Their support email address, if you email it, comes back as non-existent. Right now, eBay is filled with a number of broken "customer return" systems that you can purchase inexpensive for parts. (These are the older "Brewie" model rather than the "Brewie+" but that doesn't seem like a good sign.)
I have a friend who enjoys repairing broken devices and appliances. He wanted a crack at the Brewie+ in my basement, so last night we cracked it open and had a look. If nothing else, when the repair parts arrive from the Brewie folks, we'd have a good idea how to install them.
Here's the bottom of the kettle, with the heating element removed:
 |
| Bottom of the boil kettle |
And the heating element itself:
 |
| Close-up of the heating element connections |
 |
| Evidence of burning at the heating element |
So you can see that during one of the previous brew sessions, issues with the wiring attached to the heating element and the thermal cut-out switch caused the wiring to burn out at the connector end. This happened badly enough on the side with the thermal cut-out switch that the terminal broke right off that switch. I'm probably fortunate that there wasn't a serious fire.
For those curious about what the inside of a Brewie+ looks like, I'm sharing some other photos, taken during parts of the disassembly.
 |
| The Brewie+ partially disassembled, to allow access to the heating element |
 |
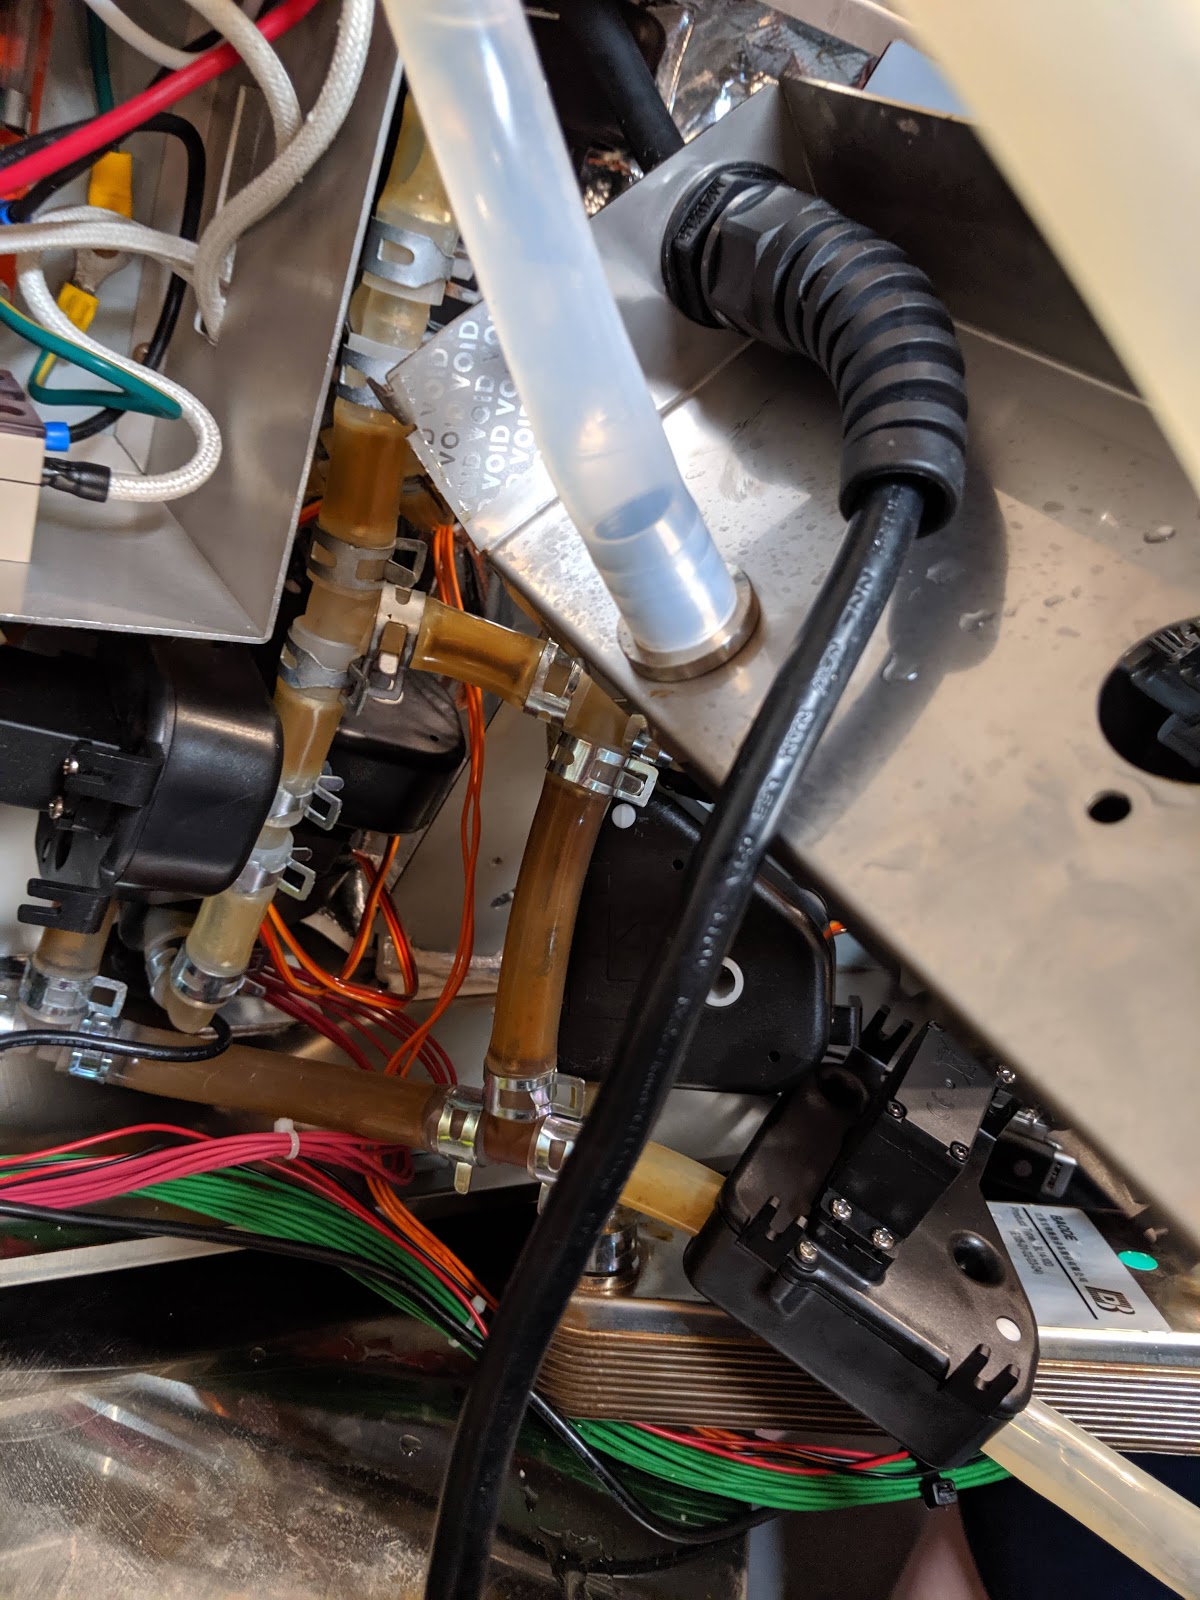
| Close-up view of the plumbing - dirty because I couldn't run a cleaning cycle in it after it failed |
 |
| Close-up of connections that had to be unhooked to get to the heating element |
 |
| Close-up of the wiring on the boil side of the Brewie+ |
I bought one of the original Brewie units for sale on eBay. It turned out to have suffered a serious drop and showed a lot of mangled metal. The mash compartment was misshapen, the base plate was damaged, the lids no longer lined up, etc. It also failed its power-on self-test, possibly due to a power supply issue. Here are a few photos of that broken one:
 |
| The customer-returned broken Brewie (original) |
 |
| Inside the bottom plate of the original Brewie |
 |
| Power and control boards inside the original Brewie |
 |
| At left, what I think is a pump with the lid broken, off, on the mash side |
 |
| Close-up view of the internals on the boil side, note the plate chiller at bottom |
 |
| Close up of the broken pump(?) |
 |
| Two lights indicate a successful self-test, I presume one indicates only a partial success |
My friend and I are still in the midst of trying to get the Brewie+ to work again. At this point, we are waiting on the arrival of some replacement thermal cut-out switches I ordered from eBay to arrive.
The Brewie and Brewie+ share a number of internal components, which makes the older machine a good donor parts system for the new one. I may buy another broken one on eBay and see if we can't get it working with parts from this one.


Comments
Post a Comment
Note that comments to this blog are moderated in order to minimize spam comments and things that might be offensive to readers.